Table of Contents
If you’re offering services like pet sitting, dog walking, overnight boarding, or grooming, the standard “Add to Cart” flow wasn’t built for you. That’s why Huskify now supports a booking form for service products— a dedicated form you configure once per product, giving your customers a smooth, professional booking experience right on your store.
What the Booking Form includes
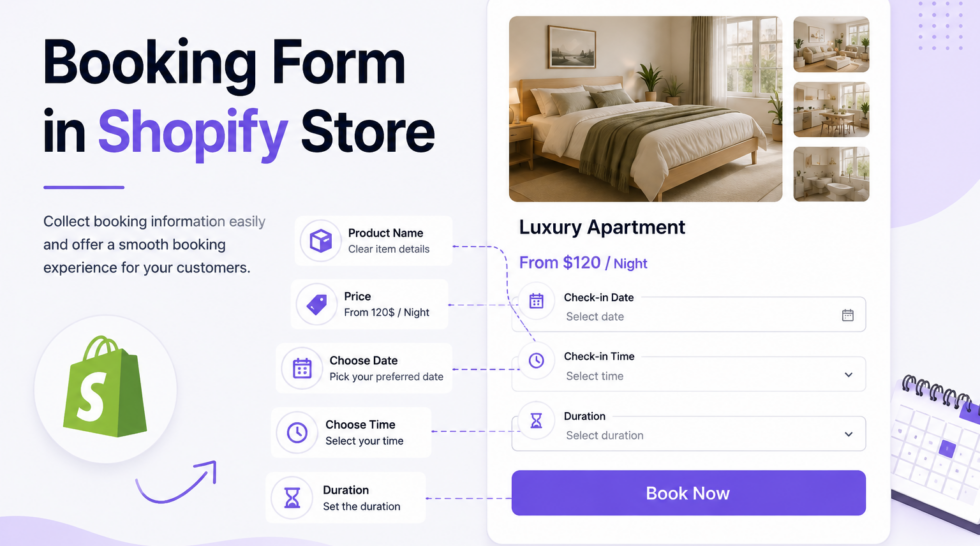
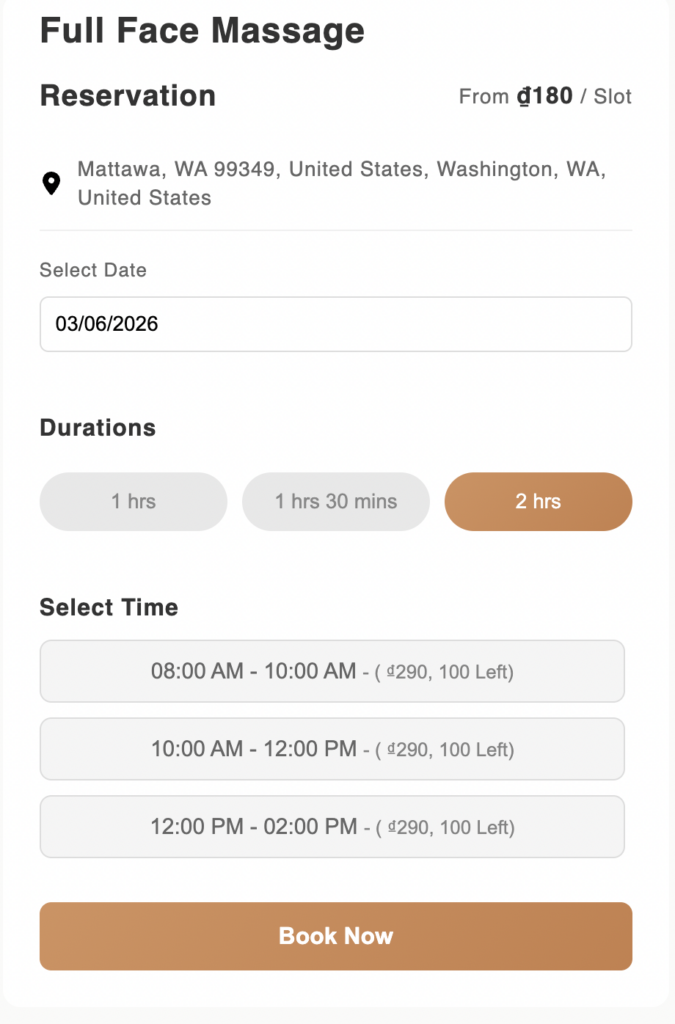
When enabled, the booking form replaces the default purchase flow with fields tailored for service bookings:
- Date — customers pick their desired service date
- Address — capture the service location upfront
- Duration — let customers specify hours, nights, or sessions
- Price display — show a pricing label like “From $120 / per night” so customers know what to expect
How to configure it
Step 1 — Create a dedicated product template in your theme
This is the most important step. You need a separate product template for your booking products so that your regular products (with Price and Add to Cart) are completely unaffected.
Go to Online Store → Themes → Edit, then navigate to Product Templates and click Create a Template. Give it a recognizable name like booking or booking-product.
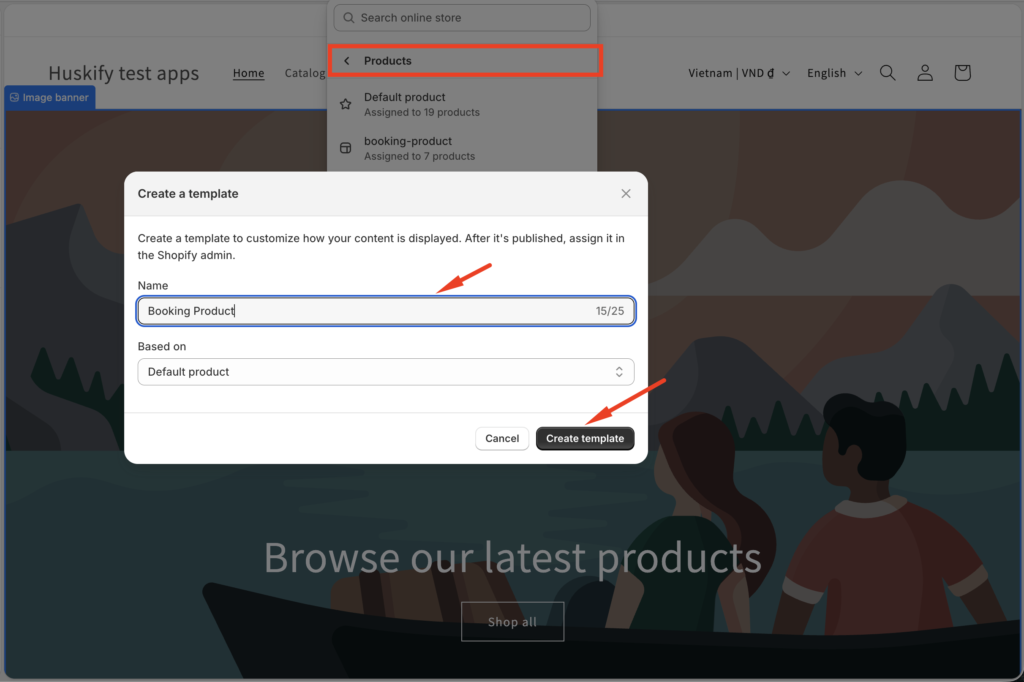
Why a new template? Because the booking form should only appear on service products. Your other products (simple, physical, etc.) will continue using the default template — with Price, Add to Cart, and everything else intact. The new template is exclusively for products that use the booking form.
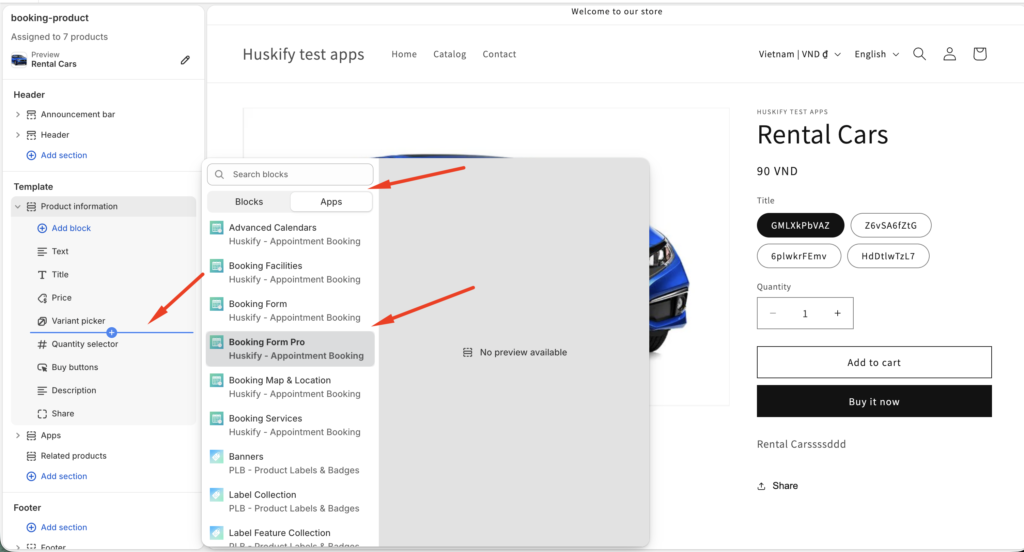
Once the template is created, open it in the theme editor and add the Booking Form Pro app block to the product page. This is where the form will appear for your customers.
While you’re in the template editor, also hide the following default blocks — they’re no longer needed on booking products since the form handles them:
- Product name — already displayed within the booking form
- Price — shown inside the form as your configured pricing label
- Add to Cart button — replaced by the “Book Now” button
- Quantity – It is does not need for the booking service item because customer will book day, night, slot or hour.
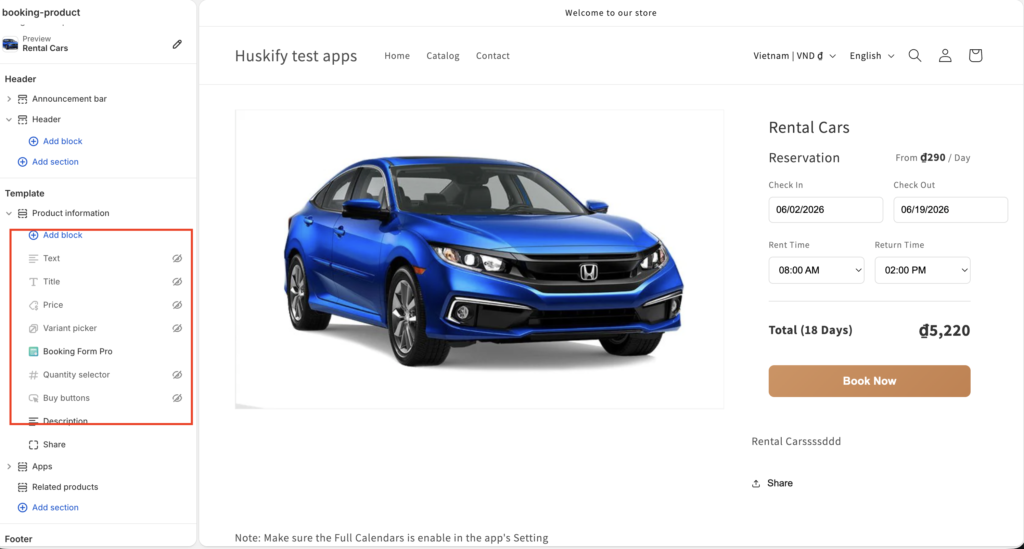
Save the template when done.
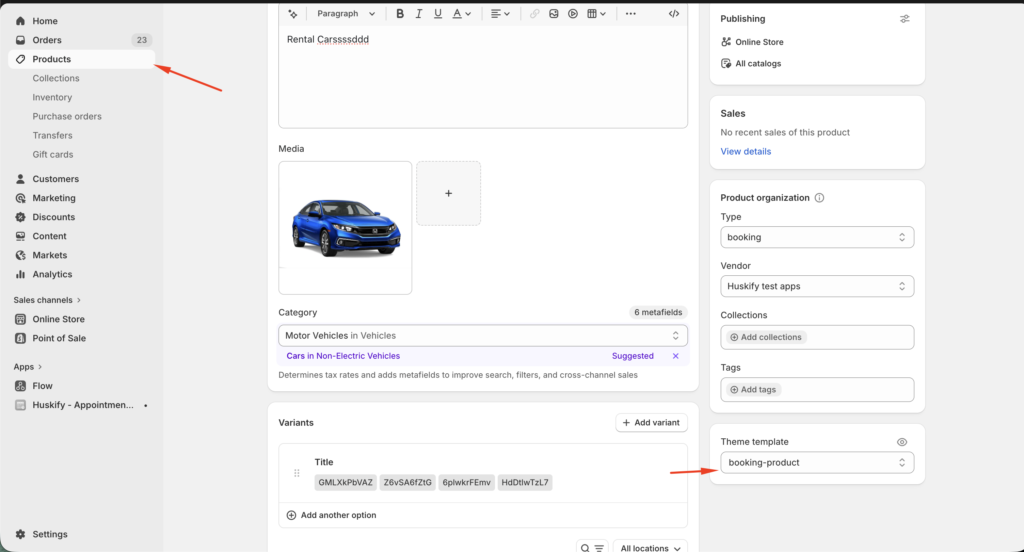
Step 2 — Assign the new template to your booking product
Back in your product editor, find the Theme template selector (usually in the right sidebar) and switch it from Default to the booking template you just created.
This tells your store to use the new template — with the booking form and without the default price/cart blocks — for this product only.
Step 3 — Save and preview
Save your changes, then use the Preview in store link to see how the booking form looks to your customers. Submit a test booking to confirm everything comes through correctly.
Things to keep in mind
- The dedicated template approach means your regular products are never affected — they keep their default layout with Price and Add to Cart working as normal.
- You only need to create the booking template once. Every future service product just needs to be assigned to it.
- Consider creating a dedicated product for each service type (e.g., “Overnight Boarding”, “Home Visit”) so each one can have its own form configuration.
That’s all it takes. Create the template once, configure the form once, and every customer who visits your booking product gets a clean, purpose-built experience — with all the details you need collected automatically.