Table of Contents
Whether you’re Sell Both Simple Products and Booking Services on Shopify Store such as renting out a camera, booking a motorbike tour, or selling mountaineering gear — Huskify – Appointment Booking lets you handle all of it from one store. The key is understanding when to use a standard product form and when to use a booking form, and how to set each one up correctly.
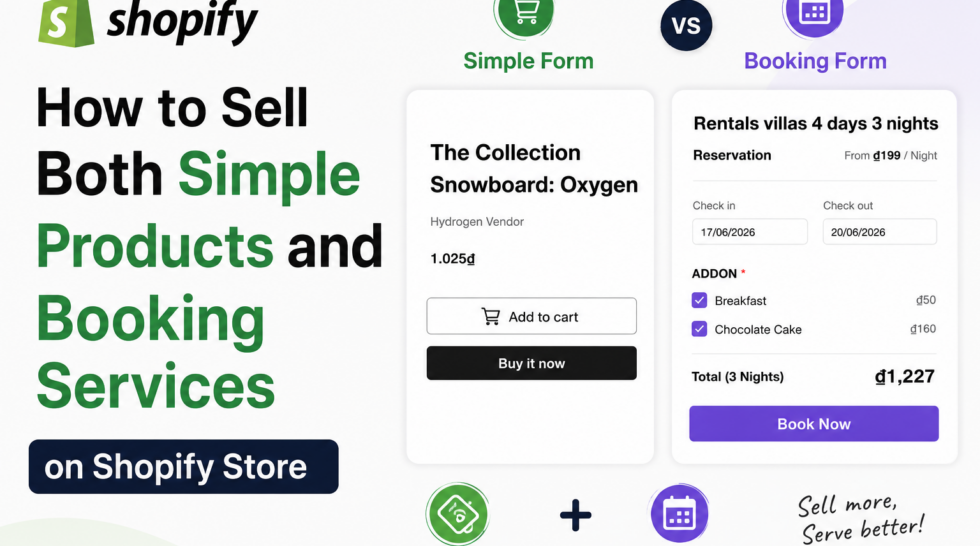
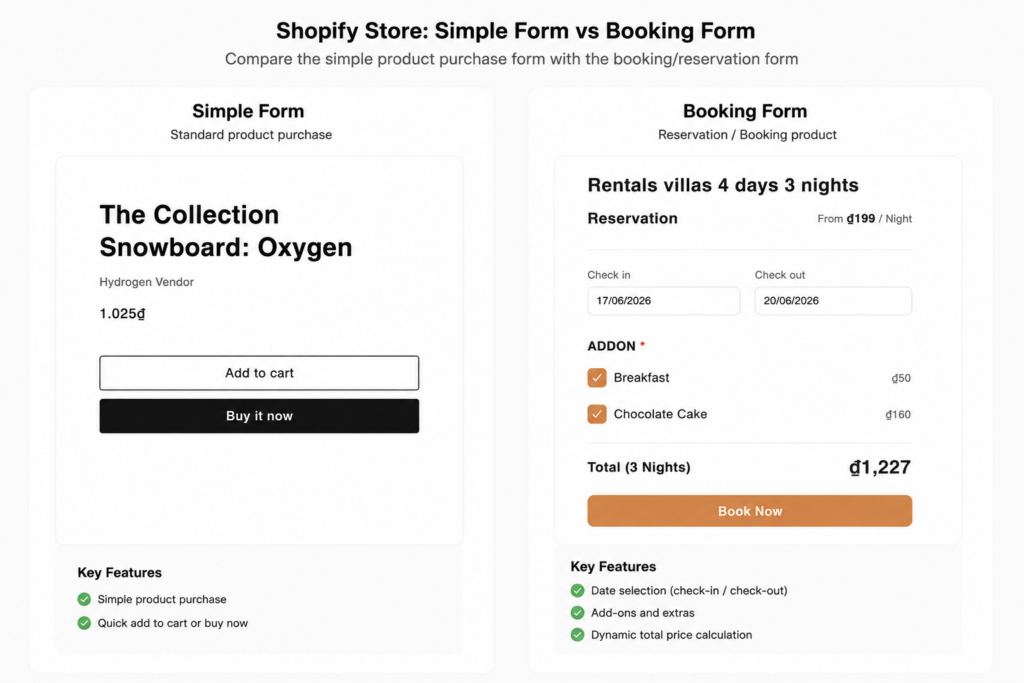
1. Simple product form vs. booking form — what’s the difference?
Not every product works the same way, and your purchase form should reflect that.
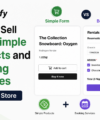
A simple product form is the default in any Shopify-based store. It’s designed for physical goods — things customers buy, receive, and own. When a customer lands on a product like a mountaineering backpack or a bicycle, they see the product price, a quantity selector, and an Add to Cart button. The transaction is straightforward: pick a quantity, add to cart, check out.
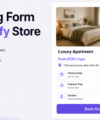
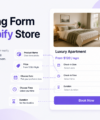
A booking form works differently. When a customer wants to rent a motorbike for a weekend or book a camera for a day shoot, they’re not buying a product — they’re reserving a time slot. What they need to provide is a date, a time, and any relevant details. There’s no quantity to select and no cart in the traditional sense. Instead, they submit a booking request and you confirm it
Mixing these two flows on the same template causes problems. Showing an Add to Cart button on a rental product confuses customers. Showing a date picker on a physical product makes no sense. That’s why Huskify’s approach is to keep them completely separate — using different product templates for each type.
| Simple product | Booking product | |
| Price display | ✅ Shown | Shown as “From $X / per day” |
| Quantity selector | ✅ Yes | ❌ Not needed |
| Add to Cart button | ✅ Yes | ❌ Replaced by Book Now |
| Date input | ❌ No | ✅ Yes |
| Time input | ❌ No | ✅ Yes |
| Extra Options | Custom Options | ADD-ONS |
| Form purpose | Purchase | Reservation |
2. Why you need a separate template for booking products
In Shopify, every product page is rendered using a product template. By default, all products share one template — which includes price, quantity, and Add to Cart. This works perfectly for simple products.
For booking products, you need a dedicated template. This template will include the Huskify – Appointment Booking Form app block instead of the default purchase elements. The result: customers on a booking product page see a booking form, while customers on a simple product page see the standard layout — no conflicts, no confusion.
You only need to create this template once. After that, any product you want to turn into a bookable service simply gets assigned to it.
3. Step-by-step setup
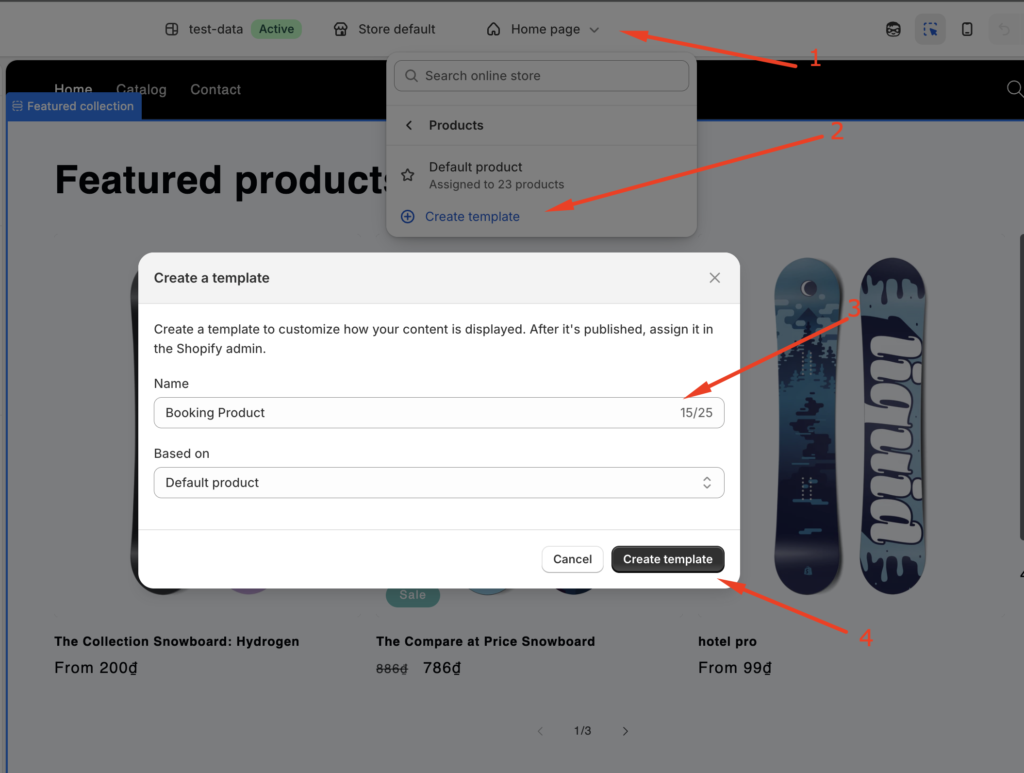
Step 1 — Create a new product template
Go to Online Store → Themes → Edit in your Shopify admin. In the theme editor, open the Product Templates section and click Create a Template. Name it something clear like booking-product or service-booking so it’s easy to identify later.
This new template starts as a copy of your default product template. In the next step, you’ll customize it specifically for bookings.
Step 2 — Add the Huskify – Appointment Booking Form to the template
With the new booking template open in the theme editor, click Add block or Add section within the product page layout. Find the Huskify – Appointment Booking Form app block and add it to the template.
Once added, you’ll see the booking form appear in the preview. At this point, also hide or remove the following default blocks that are no longer needed for booking products:
- Price block — the booking form handles pricing display
- Quantity selector — not relevant for reservations
- Add to Cart button — replaced by the Book Now button inside the form

Save the template.
Step 3 — Assign the template to your booking product
Open the product you want to make bookable in your Huskify dashboard (for example, “Motorbike Rental” or “Camera Hire”). In the product editor’s right sidebar, find the Theme template dropdown and change it from Default to your new booking template.

Save the product. That product will now display the booking form to customers, while every other product continues using the default template unchanged.
3. What’s inside the Huskify – Appointment Booking Form
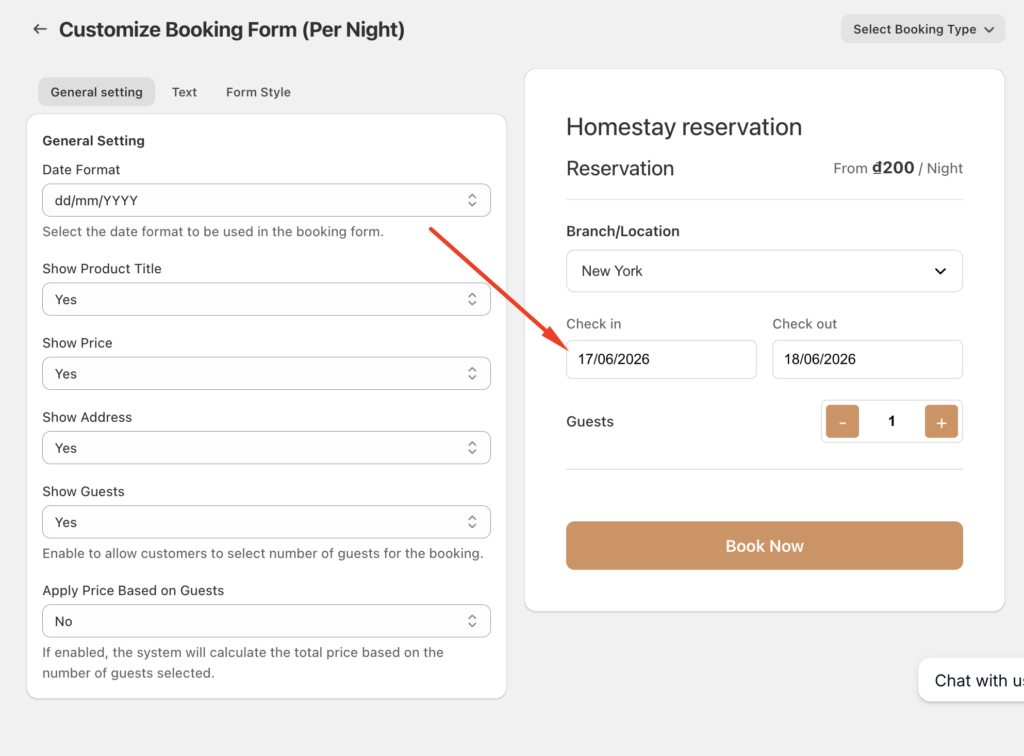
Once the booking form is added to your template, you have full control over how it looks and what it collects. Here’s what you can configure:
Fields and visibility
- Show or hide the product name at the top of the form
- Show or hide the address field — useful if you need to know where a service will take place
- Enable a date input so customers can select their booking date
- Enable a time input and choose between 12-hour (AM/PM) or 24-hour format
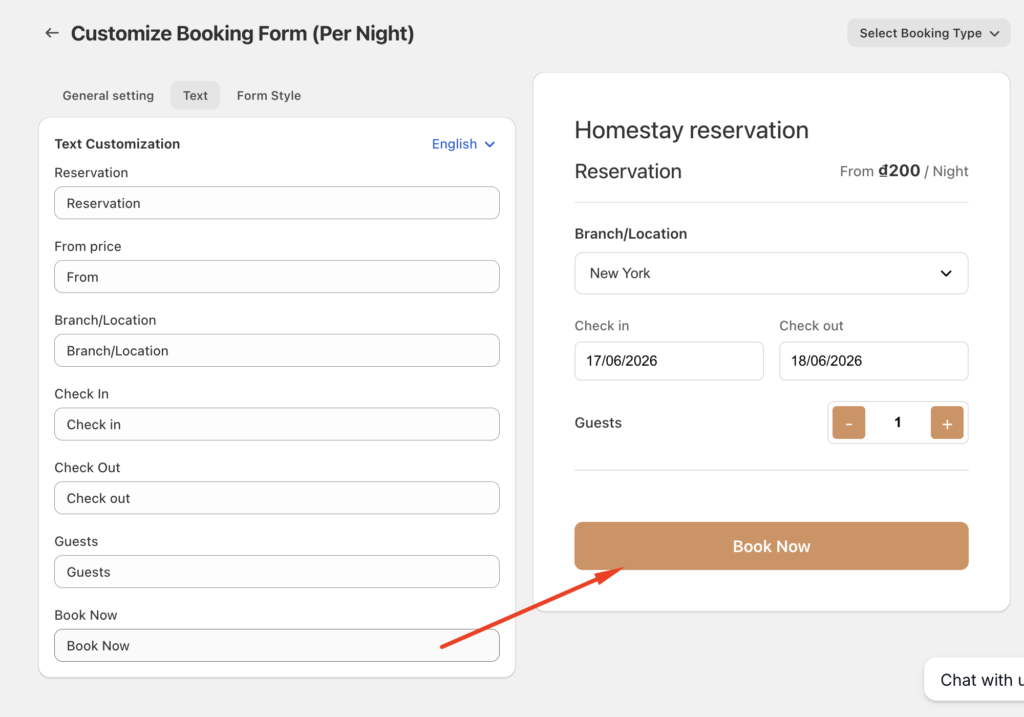
Text customization
- Change the label on the submit button — use “Book Now”, “Reserve”, “Request Booking”, or anything that fits your brand
- Edit the pricing label to display something like “From $45 / per day” or “From $120 / per night”
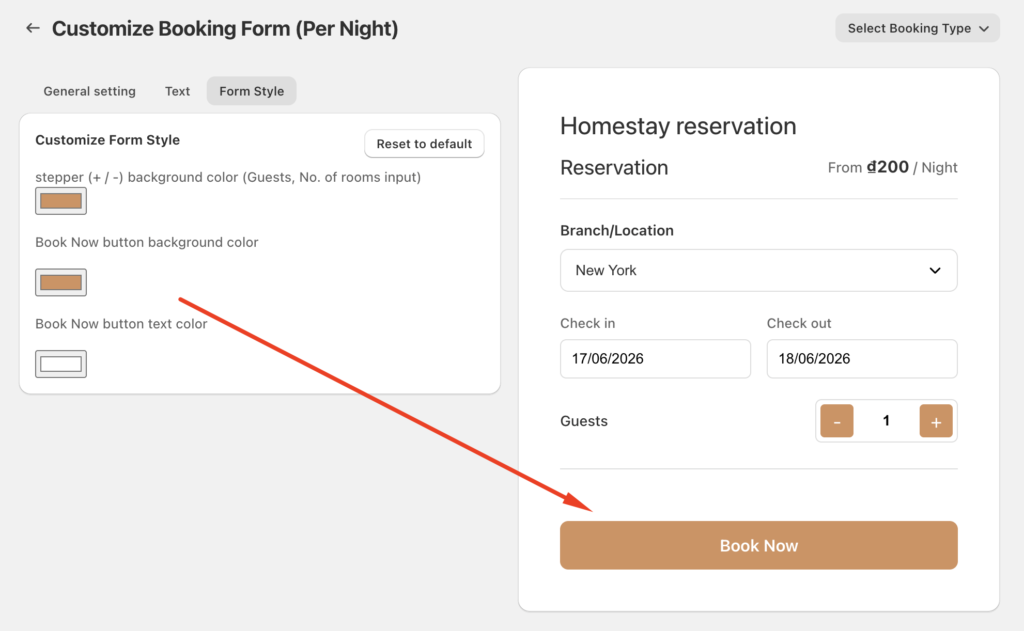
Style customization
- Adjust the form’s colors to match your store theme
- Change font size, button color, and input border style
- The form is fully responsive and works on mobile without any extra configuration
Everything you configure here is saved to the product and applies automatically every time a customer visits the page.
4. Conclusion
Running a store with both physical products and bookable services doesn’t have to be complicated. The key is keeping the two flows separate — simple products use the default Shopify template with price, quantity, and Add to Cart; booking products use a dedicated template with the Huskify – Appointment Booking Form.
You set up the booking template once, assign it to whichever products need it, and configure each form to match the service. From there, customers get a clean, purpose-built experience depending on what they’re doing — buying gear or booking a service — and you get all the information you need, automatically.